Table of Contents
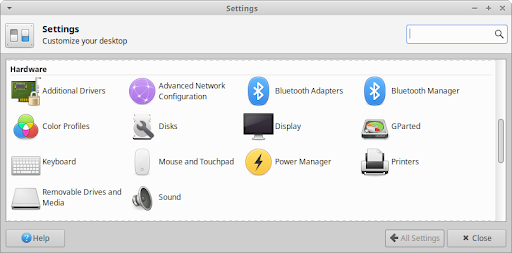
Your computer consists of a number of components and devices that collectively are known as computer hardware. This includes internal components, such as the CPU, motherboard, hard disk, graphics card, sound card, wifi adapter, and bluetooth adapter, as well as external peripheral devices, such as the monitor, mouse, keyboard, and printer.
Xubuntu configures your hardware automatically with optimal defaults, but there may be occasions when you need to make changes to these hardware settings. This section provides information on tools to configure them, which can be accessed from the Hardware category of the  , the Settings category of the
 ![]() (Ctrl + Escape), and in the Application Finder (Alt + F3).
(Ctrl + Escape), and in the Application Finder (Alt + F3).
Whether you have a single screen or multiple monitors, you can easily access their customization options by opening the Display settings dialog, which is also accessible with the keyboard shortcut Super + P.
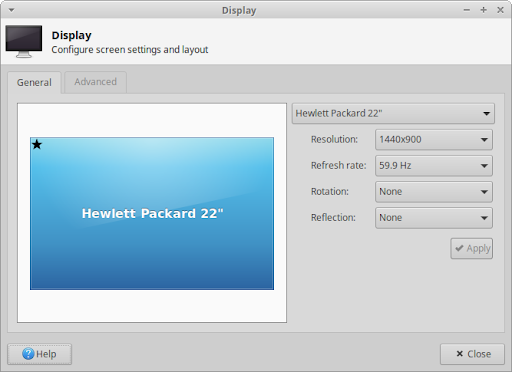
On the General tab, you can change the screen’s resolution, refresh rate, rotation and reflection in the various drop-down lists. Click the Apply button to try out the changes and a confirmation dialog will appear to let you confirm or reject the changes. The previous configuration will be restored if you don’t confirm or reject the changes within 10 seconds.
![[Note]](../../libs-common/images/note.png)
|
|
|
Note: To change how fonts are rendered or set a custom DPI text size, see the options in the Fonts tab of the Appearance settings dialog. To manage monitor power saving options such as when it should enter power-save mode or how much to lower the brightness after inactivity (only applicable to laptops), see the options in the Display tab of the Power Manager settings dialog. If you are experiencing screen tearing when playing videos, you may change the vblank value of the compositor or modify the xorg config file. |
High resolution displays may require specific settings to achieve readability of text and other screen objects. High-end laptop screens and other ultra-high resolution displays may have high pixel density in a small form factor. They are commonly referred to as HiDPI (High Dots Per Inch), 4K, UHD, WQHD, QHD, or 1440p displays. Some laptops with these types of screens include MacBooks with “Retina Display”, Dell XPS 13, and ThinkPad X1 Carbon. 4K and 8K UHD TVs may also require customization to make text readable at the viewing distances typical of these displays.
To improve the visibility of text and objects on these large resolution displays, you can make the following changes.
Open the Appearance settings dialog, change to the Settings tab, and change Window Scaling to ‘2x’.
Open the Window Manager settings dialog and in the Style tab, change to a HiDPI theme like ‘Default-hdpi’ or ‘Default-xhdpi’.
When you have an external monitor or TV screen connected to your laptop or multiple monitors and/or screens connected to your desktop, more options will become visible on the General tab of the Display settings dialog. Select the screen that you wish to change the settings of by selecting it in the preview area or changing the entry in the screen drop-down list.
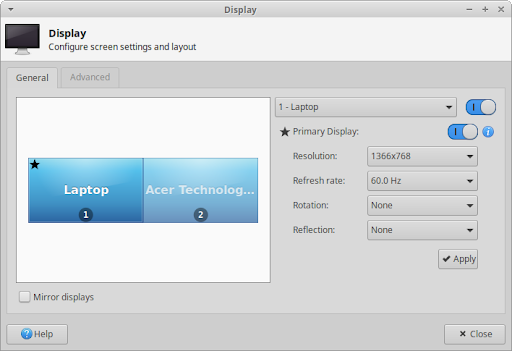
One of the additional options presented in a multi-screen setup is the option to rearrange the displays in the preview area by dragging and dropping them to match how they are physically placed. Additional multi-screen options include turning off a screen, setting a monitor as the primary display, mirroring the desktop on multiple displays, or extending the desktop across both screens.
|
|
|
|
Note: With a screen set as the primary display, you can then configure the panels, desktop icons, and notifications to appear on that screen. Click the information icon next to the Primary Display toggle button to open the respective setting dialogs. |
The Advanced tab provides even more multi-monitor options, including the option to save a display configuration so that it can be easily applied at a later time. When the Configure new displays when connected option is toggled, the below Displays mini dialog will appear, providing the most common display configurations, as well as any user-saved display configurations. The keyboard shortcut Super + P will open this dialog in a multi-monitor setup and clicking the ‘Advanced’ button opens the Display settings dialog.

The Automatically enable profiles when new displays are connected toggle will apply a user-saved display configuration when the connected displays match the displays found in a saved display configuration.
For color-sensitive work, the Color Profiles settings dialog allows you to install and manage color profiles for your displays, printers, and scanners. In order for color profiles to be used, the required daemon will need to be installed and running in the background:
To calibrate your display, you will need to install DisplayCAL, GNOME Color Manager (![]() gnome-color-manager
gnome-color-manager![]() redshift
redshift
During the installation of Xubuntu, options to select the keyboard’s language and layout were presented and applied. In order to make changes to these and additional keyboard options, open the Keyboard settings dialog.
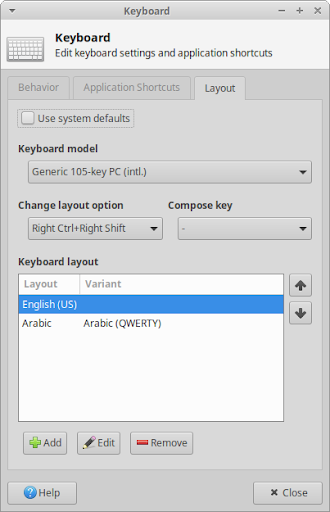
The Behavior tab provides options for the Num Lock key state, key repeat speed and delay, as well as text cursor blinking speed. The Application Shortcuts tab allows you to manage the keyboard shortcuts for the launching of applications. The Layout tab provides options to select the keyboard model and manage keyboard languages and layouts. With multiple keyboard layouts present, you also have the option to set a keyboard shortcut to cycle through the keyboard layouts.
|
|
|
|
Note: To easily determine which keyboard layout is currently active and switch between them, you can add the Keyboard Layouts plugin to the panel. For additional non-application keyboard shortcuts, see the Keyboard tab of the Window Manager settings dialog. For control over the behavior of various power related keyboard buttons, see the General tab of the Power Manager settings dialog. |
Pointer devices like a mouse, trackpad, trackball, or graphical tablet are automatically detected and configured during startup or when plugged in. If you want to make changes to the default options and behaviour of a device, open the Mouse and Touchpad settings dialog.
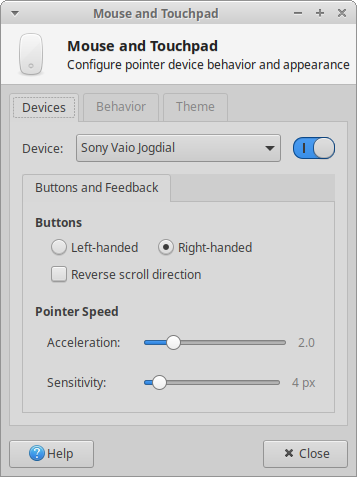
The Devices tab allows you to select each individual device from the Device drop-down list and adjust their individual options. This includes whether it is enabled, as well as its button arrangement, scroll direction, pointer speed, and trackpad sensitivity. If the selected device is a trackpad that is using the Synaptics driver, a Touchpad tab will appear next to the Buttons and Feedback tab with options to enable and disable the trackpad while typing, tap to click, as well as edge and two-finger scrolling. A Tablet tab will appear when a device is detected to be using the Wacom driver.
The Behavior tab has global settings that affect all pointer devices, including how sensitive the drag and drop and double click operations are. The Theme tab allows you to set the cursor theme.
Some touchpads may be detected as normal mouse devices, even though they are actually touchpads. In this case, the Touchpad device will not be available in the mouse preferences. See the Touchpads page in the Ubuntu community wiki for more information on touchpads.
Sound in Xubuntu is processed through the PulseAudio sound server, which is capable of performing advanced operations on sound data going to and from your hardware devices. Making changes to the sound preferences can be done through the multimedia keyboard keys, the sound plugin in the notification area of the panel or the PulseAudio Volume Control settings dialog.
The panel sound plugin gives you easy access to raise, lower and mute the volume of devices, select from multiple input and/or output devices when applicable, as well as control the playback of various audio and video media players. The Audio mixer... entry at the bottom of the plugin popup window will open the PulseAudio Volume Control settings dialog.
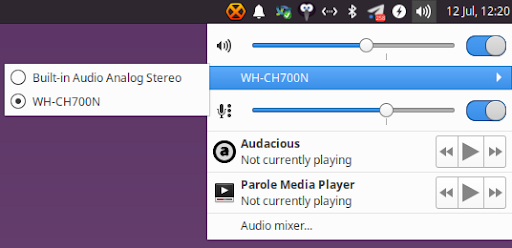
It is possible to adjust the output volume by using the mouse scrollwheel above the sound plugin icon. To customize whether multimedia keys are enabled, if a notification appears when the output volume is changed, and which media players will appear in the plugin popup window, right-click on the sound plugin.
The PulseAudio Volume Control settings dialog, which is found in the Multimedia category of the ![]() , has various tabs to view and configure sound settings.
, has various tabs to view and configure sound settings.
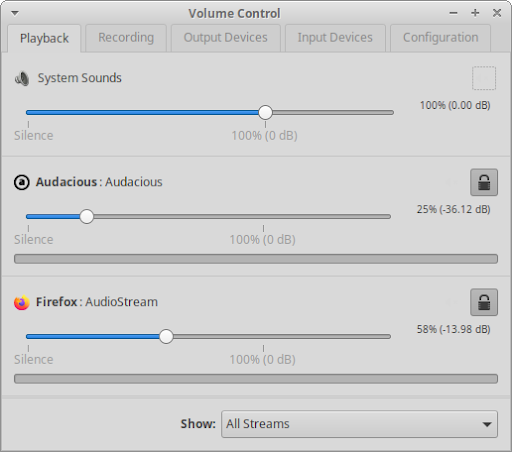
Playback - You can adjust the volume of system sounds, as well as set the volume, channel balance, and output device of each running application.
Recording - Lists applications that are currently recording and allows the adjustment of the volume and input device.
Output Devices - Lists audio output devices and allows the adjustment of their output source, volume, and latency.
Input Devices - Lists audio input devices and allows the adjustment of their input source, volume, and latency.
|
|
|
|
Note: To enable system sounds, open the Appearance settings dialog, change to the Settings tab and enable ‘Enable event sounds’. Install one of the sound themes, such as FreeDesktop ( |
A device driver is a computer program that controls a particular device connected to a computer. It acts as a bridge to allow the operating system and other software to communicate with the hardware. A device driver gets activated when the device is found on a computer or when the device is plugged in.
Most device drivers are installed by default in Xubuntu, so everything should work automatically when you plug it in. Device drivers can either be open source or proprietary and are provided by the hardware manufacturer or the open source community.
Xubuntu is a Linux distribution and the foundational part of the operating system is the Linux kernel. The Linux kernel contains thousands of device drivers and the majority of them are open source, which allows kernel developers to modify them. To update these open source drivers, you only need to update the Linux kernel, which is one of the components updated through the Software Updater.
When hardware manufacturers do not release sufficient technical details for their hardware, it is not possible to create a complete open source driver, so the hardware may not have an open source driver or will have an open source driver with limited functionality. Some open source drivers are reverse-engineered to provide an alternative to the hardware manufacturer’s proprietary driver, but these will not be as feature complete.
Some hardware manufacturers do not provide open source drivers for their hardware, but instead provide a proprietary driver, also known as a closed-sourced driver or binary blob. Without these proprietary drivers or firmware, the components and devices may not function properly or at all. These drivers will normally need to be installed manually, as they can’t be included in the kernel. They will primarily be drivers for graphics cards, wireless adapters, and processor firmware, with the most common ones being:
NVidia Graphics Driver - Though there is a reverse engineered open source driver, called ‘Nouveau’, it does not have re-clocking and power management features to make it run optimally for gaming and may cause issues on legacy cards not supported by the current version of the driver.
AMD Graphics Driver - The open source ‘RadeonSI’ driver is recommended for gaming and general home-use, while the proprietary ‘AMDGPU-PRO’ driver is recommended for workstation users requiring features not implemented in the open source driver, primarily OpenCL 2.0 support.
Intel Wireless Driver - The wireless driver is open source but requires a proprietary firmware to run.
Broadcom Wireless Driver - The wireless driver is open source but requires a proprietary firmware to run.
AMD/Intel Microcode - These are stability and security updates to the processor firmware and are recommended to be enabled.
|
|
|
|
Note: If you enabled the ‘Install third-party software for graphics and Wi-Fi hardware and additional media formats’ checkbox during installation, then the required proprietary drivers will be automatically installed and enabled. |
To view and manage which proprietary devices are used on your system, you can open Additional Drivers, which will open the Software & Updates settings dialog to the Additional Drivers tab.
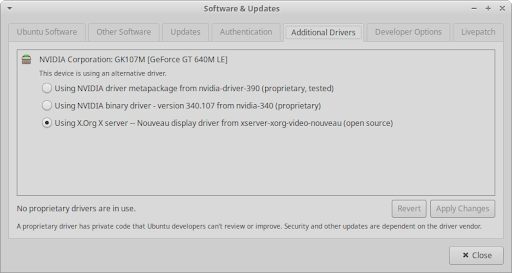
Some computers may not have any devices listed because either the open source drivers are fully supported or because there are no proprietary drivers for the devices. If there are any proprietary drivers listed, you will have the options to:
enable them if the device does not currently have an open source driver.
switch between the open source and proprietary drivers.
switch between different versions of the proprietary driver.
disable them if they are causing problems or you would just like to turn them off.
|
|
|
|
Note: Proprietary drivers are stored in the restricted software repository. If this repository wasn’t enabled during installation, you will need to enable it to see entries listed in the dialog. You can do so by switching to the Ubuntu Software tab and enabling the ‘Proprietary drivers for devices (restricted)’ checkbox. |
|
|
|
|
You will need to be connected to the internet to install drivers. You will be prompted to enter your password when changing the driver and may need to restart your computer to finish enabling or disabling the driver. |
|
|
|
|
Caution: It will generally be rare to find device drivers on a hardware manufacturer’s website. If you wish to install a driver manually, please make a backup of your data and system as a precaution and be careful to follow the instructions correctly. |
 |
 |
|
| Chapter 6. Settings - Personalization |

|
Chapter 8. Settings - Connectivity |