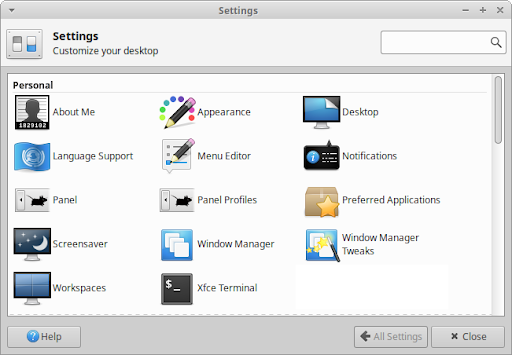
Similar to other desktop or mobile operating systems, Xubuntu comes with a default look and feel that some users will prefer to customize to their needs. Unlike Windows, Mac OS and some Linux desktop environments, Xubuntu comes pre-installed with many customization tools that give users a lot of control.
Xubuntu’s customization settings can be accessed from the Personal category of the  , the Settings category of the
 ![]() (Ctrl + Escape), Application Finder (Alt + F3), or the right-click menu of an object.
(Ctrl + Escape), Application Finder (Alt + F3), or the right-click menu of an object.
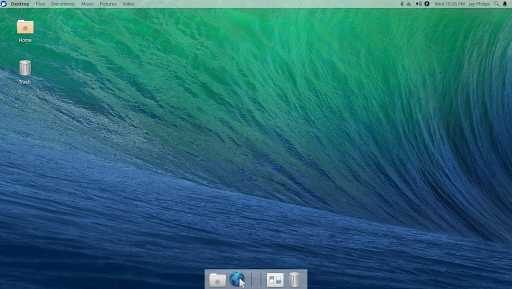
Xubuntu’s default panel layout has a single panel at the top of the screen with the menu, window list, and notification area. This panel layout can be switched to another bundled panel layout or can be manually customized.
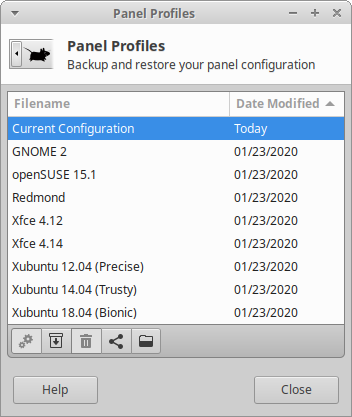
The Panel Profiles settings dialog makes it easy to switch to any of the bundled panel layouts or apply an imported panel layout. It also makes it easy to save your current panel layout and export it.
- This layout is inspired by the default GNOME 2 desktop environment panel layout, which has a panel at the top and bottom. The top panel has a classic tree menu, places context menu, settings and browser launchers, and notification area, while the bottom panel has the show desktop button, window list and workspace switcher.
- This is the default layout found in the Xfce edition of openSUSE, which has a single panel at the bottom with a modern searchable menu, show desktop button, window list, workspace switcher, and notification area.
- This layout is inspired by Microsoft Windows XP, with a single panel at the bottom that has a classic menu, windows list and notification area.
- This is the default Xfce 4.12 layout that contains a panel at the top and bottom. The top panel has a classic menu, window list, workspace switcher and notification area, while the bottom centered panel has a show desktop button, user folders button, and various application launchers.
- This is the default Xfce 4.14 layout and is similar to the Xfce 4.12 panel layout, with the exception of having a smaller top panel with additional audio, battery and notification indicators.
- This was the default panel layout used in Xubuntu’s 2012 LTS release and is similar to the Xfce 4.12 panel layout, but has an auto-hide panel at the bottom.
- This was the default panel layout used in Xubuntu’s 2014 LTS release and has a single panel at the top, with a modern searchable menu, window list and notification area.
- This was the default panel layout used in Xubuntu’s 2018 LTS release and is similar to the Xubuntu 14.04 (Trusty) panel layout, with the addition of audio and notification indicators.
To make minor changes to Xubuntu’s panel(s), you can do the following:
Drag an application launcher from the ![]() , Desktop or Application Finder onto the panel to add it to the panel.
, Desktop or Application Finder onto the panel to add it to the panel.
Right-click an application launcher in the ![]() and select the Add to Panel entry in the context menu to add it to the panel.
and select the Add to Panel entry in the context menu to add it to the panel.
Right-click on any of the panel items and select the Properties, Move, or Remove entries in the context menu to customize, move to the desired position, or remove from the panel.
Right-click on any of the panel items and selecting Panel -> Add New Items... to add a new item to the panel.
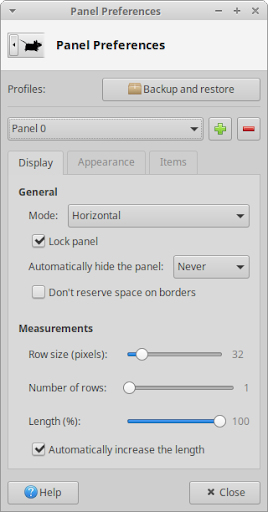
For other changes to panel(s), you will need to open the Panel settings dialog, which is also accessible by right-clicking on any of the panel items and selecting Panel -> Panel Preferences.... The top section of the dialog gives access to open the Panel Profiles settings dialog and the ability to select, add and remove panels. The remainder of settings are broken up across three tabs.
- On this tab, you can set the panel’s width and height, vertical or horizontal orientation, position on the screen, and hiding behaviour. To move the panel, you will need to uncheck the Lock panel checkbox and drag it by one of the two handles that appear on either side.
- On this tab, you can set the panel’s transparency, icon size and whether its background is a color or image.
- This tab allows you to add, arrange, and remove plugins, as well as access plugin properties through the button bar. It is also possible to rearrange items by dragging with the mouse, and access properties by double-clicking.
It is possible to install additional panel plugins, also known as panel applets. Panel plugins not listed in the Add New Items dialog will need to be installed before they can be used. Some of the plugins are listed here and the more popular/useful ones are for clipboard management (![]() xfce4-clipman-plugin
xfce4-clipman-plugin![]() xfce4-appmenu-plugin
xfce4-appmenu-plugin
Users who want a dock similar to the one found on Mac OS and elementary OS can choose from these docks - Plank (![]() plank
plank
![[Note]](../../libs-common/images/note.png)
|
|
|
If you have multiple screens, additional panel configurations will appear on the Display tab, including the options to configure which display the panel should appear on or whether the panel should span all monitors. |
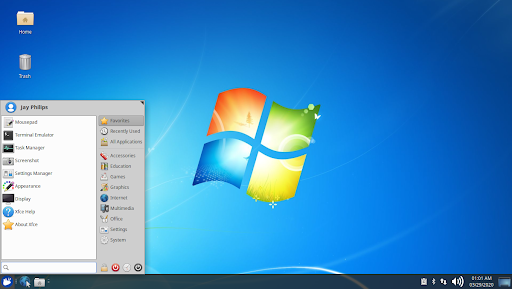
The easiest tweak you can make to the ![]() is to customize your Favorites, so you have easy access to your most important/used applications as soon as you open it. You have the options to:
is to customize your Favorites, so you have easy access to your most important/used applications as soon as you open it. You have the options to:
Add an application by locating the application either by searching for it by name or by browsing the categories, right-clicking on it and selecting Add to Favorites from the context menu.
Remove an application by right-clicking on an application in Favorites and selecting Remove From Favorites from the context menu.
Rearrange/reposition an application by left-clicking an application in Favorites and dragging it to the desired position.
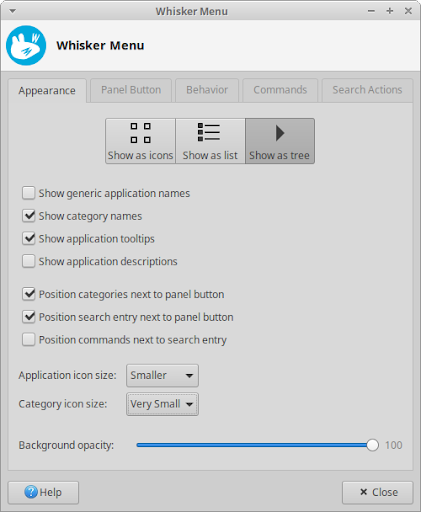
For options to customize the look and feel of the ![]() , right-click on the menu button and select Properties in the context menu to launch the Whisker Menu settings dialog. The dialog is divided into tabs for:
, right-click on the menu button and select Properties in the context menu to launch the Whisker Menu settings dialog. The dialog is divided into tabs for:
Appearance - Contains options for how the applications and categories will look, as well as the placement of the application list, category list, search field, and command buttons.
Panel Button - Select whether the Menu button is an icon, a text label, or icon and label, and what that label should be.
Behavior - Decide on the feel of the Menu, including whether categories should be selected once the mouse hovers over them, whether the Menu should stay open even when focus is lost, whether the Recently Used category should be displayed by default, and whether session commands should have confirmation dialogs.
Commands - Enable or disable the appearance of the Settings Manager and session commands in the command buttons section of the Menu, as well as the appearance of the Edit Applications entry in the Menu button’s context menu.
Search Actions - List the various keyword patterns that can be used to extend the functionality of the search field and make it easy to search other sources like Wikipedia or the file system.
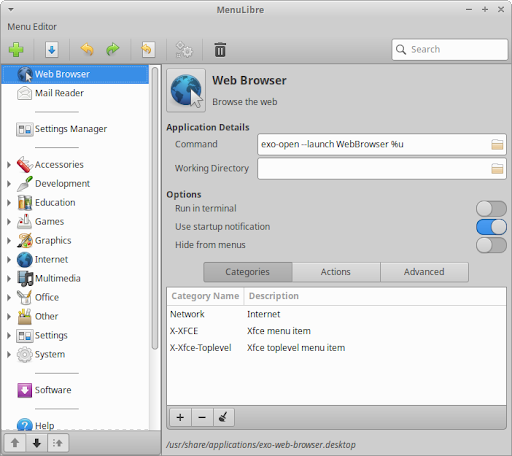
To customize which applications appear in the ![]() , open the Menu Editor utility, which is also accessible by right-clicking the Menu button and choosing Edit Applications from the context menu. Using this editor you can create new application launchers or categories, as well as edit the details of existing ones, including which categories the application appears in, whether the application will be visible in the menu, and the icon or name used by the application.
, open the Menu Editor utility, which is also accessible by right-clicking the Menu button and choosing Edit Applications from the context menu. Using this editor you can create new application launchers or categories, as well as edit the details of existing ones, including which categories the application appears in, whether the application will be visible in the menu, and the icon or name used by the application.
|
|
|
|
For more in-depth information on how to use all of those options, consult the MenuLibre online documentation. |
The desktop is visible once you login to your account and its background is also present on the login and lock screens. To access customization options, open the Desktop settings dialog, which is also accessible by right-clicking a blank area of the desktop and selecting Desktop Settings from the context menu.
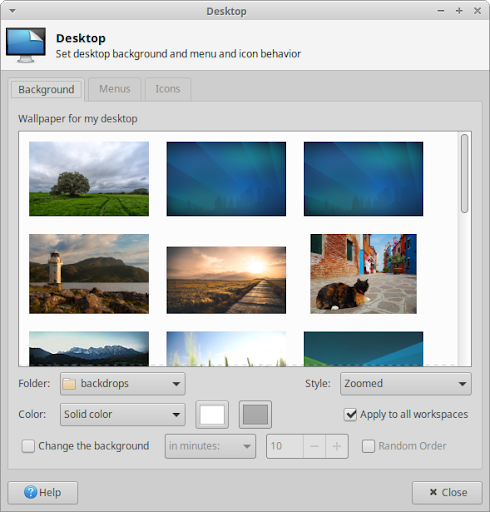
Once the Desktop settings dialog is launched, the Background tab gives you options to choose between a wallpaper image, a color gradient, a single color, or a combination of wallpaper(s) and color(s) as the desktop background.
When choosing an image as the background from the wallpaper list, you may choose from the default selection that comes with Xubuntu or select an image from a different folder by changing the Folder dropdown. You have the option to set how the wallpaper will fit on the screen in the Style dropdown. The default is Zoomed, which resizes the image preserving its aspect ratio and cropping the image to fill the screen. If you have multiple monitors connected, then the dropdown will also have a Spanning screens entry, to stretch the wallpaper the displays.
If there are multiple images in the wallpaper list, you also have the option to set the background to automatically cycle through them in an ordered or random sequence. By enabling the Change the background checkbox, you have several time-based options to choose from. The last option, Chronologically, sets the wallpapers to appear over evenly timed periods of a day.
|
|
|
|
The default selection of wallpapers shipped with Xubuntu includes wallpapers created by the Xubuntu team for different releases and wallpapers submitted by the community. For more community contest-winning wallpapers, search for the packages that begin with xubuntu-community-wallpapers in the Synaptic package manager. |

To set the background as a single color or a two-color gradient, set Style to ‘None’ and then set Color to the appropriate entry. You can then click on the color buttons next to the dropdown list to open the Select Color dialog. You have the option to select from the list of color presets, right-click on a color preset to customize that color, or create a custom color from scratch by pressing the plus button.
If you have multiple workspaces, also known as virtual desktops, you can choose to have the same background appear across all workspaces or use a different background for each workspace. To use a different background, uncheck the Apply to all workspaces checkbox,then move the dialog to each workspace individually and select a different background. This can be done by dragging the window to the left or right corners of the screen or pressing the keyboard shortcuts Ctrl + Alt + Home or Ctrl + Alt + End. This also is the case when you have multiple monitors connected, where each display will have the default wallpaper unless the window is dragged to other displays and the background is changed.
|
|
|
|
The easiest way to set an image as the background wallpaper is to right-click the image on the current workspace or display and select Set as wallpaper from the context menu. |
In the Icons tab of the Desktop settings dialog you can set the properties of the icons that appear on the desktop, including their sizes, sort arrangement, label font size, click activation behavior, whether or not they should have tooltips and thumbnails, and which system icons appear by default. The Icon type dropdown list gives you the option to have desktop icons for files and launchers, minimized application windows, or no icons at all.
The Menus tab of the Desktop settings dialog provides customization options for the two menus that can appear when using the mouse.
Desktop Menu - This menu appears when right-clicking the desktop. You may choose whether or not this menu includes the ![]() in a tree hierarchy.
in a tree hierarchy.
Window List Menu - This menu appears when middle-clicking the desktop. You may choose whether or not to display this menu, as well as application and workspace customization options within the menu.
A desktop theme is used to change the look and feel of the GUI (Graphical User Interface) and can consist of many things, including the desktop wallpaper, user interface styling and colors, fonts, icons, and sounds. In Xubuntu, you may change many of these individual components, so your desktop can be as unique as you like it to be.
The three main theming components that you should know about are:
- This is the appearance of the outer section of a window, including the title bar and window borders. It is also known as the window manager theme.

- This is the appearance of the user interface elements found within the inner section of the window, such as the buttons, scroll bars, and window background. It is also known as the Gtk theme.

- This is the icon set used to style the icons found in toolbars and menus, on files and folders, on application launchers and buttons. It is also known as the Icon theme.
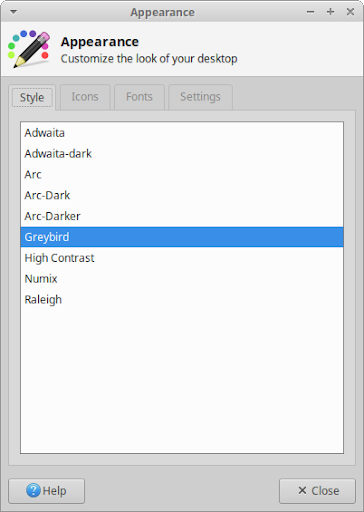
Open the Appearance settings dialog and you will be on the Style tab which will allow you to set your UI (User Interface) controls theme by selecting an entry in the list. If you switch to the Icons tab you will be able to set your icon theme by selecting an entry in the list. The Fonts tab will allow you to set the default font used for UI text, as well as setting font rendering options. The Settings tab has options to enable and disable images in menus and on buttons, as well as change how toolbar entries are styled.
|
|
|
|
Not all icon themes will work well with dark panels and window backgrounds. If you install applications that use the Qt UI toolkit, such as Qbittorrent or Clementine, the Qt5 Settings ( If you’d like to change the theme of the mouse cursor, open the Theme tab of the Mouse and Touchpad app. |
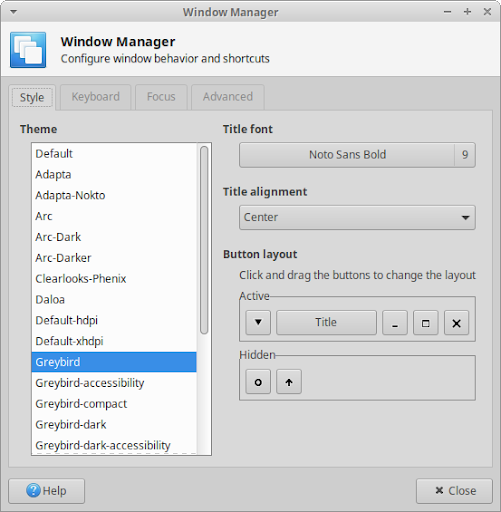
Once you open the Window Manager settings dialog, you will be on the Style tab which will allow you to set the window decoration theme, as well as customize the various elements of the title bar. This includes the alignment and font size used in the title bar text and the arrangement and visibility of the title bar buttons.
Xubuntu doesn't come with many desktop effects, but the Xfce compositor is enabled by default. The Xfce compositor is used to draw shadows behind windows and panels, as well as set the transparency of window decorations and windows in various states. To access these desktop effects, open the Window Manager Tweaks settings dialog to its Compositor tab.
|
|
|
|
If you have a low-end GPU or you don't like the desktop effects mentioned, you can turn off the compositor by unchecking Enable display compositing or modifying the other settings. |
If the default selection of themes doesn't satisfy you, you can easily download and install new themes. Sometimes window decoration and UI control themes will come bundled together as a single Gtk theme, while Icon themes may also include a mouse cursor theme. You can find new themes in the software repositories, such as:
UI themes - Adapta (![]() adapta-gtk-theme
adapta-gtk-theme![]() arc-theme
arc-theme![]() materia-gtk-theme
materia-gtk-theme
Icon themes - Papirus (![]() papirus-icon-theme
papirus-icon-theme![]() numix-icon-theme-circle
numix-icon-theme-circle![]() moka-icon-theme
moka-icon-theme
Additional themes can be found on the Internet, as ![]() .deb
.deb
UI themes - Xfce Simple Dark, Mint Mac Dark, Matcha, Plano, Pop, Flat Remix, Dracula
Icon themes - Flat Remix, Paper
If you install new themes from the repositories, or through a ![]() .deb
.deb
- With the Appearance settings dialog open to either the Style or Icons tabs, you can drag and drop a compressed .tar.xz theme file onto the theme list.
- If you are installing themes from Xfce-look.org, you can install the ocs-url installation helper tool and then click the ‘Install’ buttons in the OCS-Install column on the Files tab of the theme’s page.
- Open the compressed UI or Icon theme file and extract its contents into the appropriate folder. If these directories do not exist, you will need to create them first.
UI themes - ![]() /home/username/.themes/
/home/username/.themes/
Icon themes - ![]() /home/username/.icons/
/home/username/.icons/
|
|
|
|
The part of the folder path should be replaced with your username. In Linux, files and directories starting with a . (dot) are hidden by default and to unhide them in the file manager, open the View menu and check the Show Hidden Files entry or alternatively press Ctrl + H. To unhide them in the file open or save dialogs, right-click in the files list area of the dialog and select Show Hidden Files from the popup menu. |
 |
 |
|
| Chapitre 5. Software Management |

|
Chapitre 7. Settings - Hardware |