Table des matières
The majority of consumer printers are automatically supported by Xubuntu, as it uses the CUPS (Common UNIX Printing System) back-end. This includes support for driver-less WiFi/wired network printing with printers that support IPP Everywhere and Apple AirPrint. If your printer is not immediately supported by Xubuntu you may need to install additional software, such as Gutenprint (![]() printer-driver-gutenprint
printer-driver-gutenprint![]() ippusbxd
ippusbxd
Printer management can be done in the Printers settings dialog, which is accessible from the Hardware category of the  , the Settings category of the application
 ![]() (Ctrl + Escape), and in the Application Finder (Alt + F3).
(Ctrl + Escape), and in the Application Finder (Alt + F3).
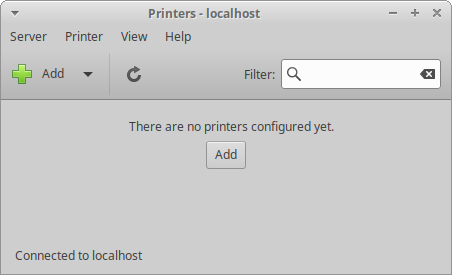
The Printers settings dialog allows you to add a new local printer (a printer directly connected to your computer through a USB, serial or printer port) or network printer (a printer connected on your network or a printer shared on the network through another computer). It also allows you to modify listed printers’ settings, such as renaming how they are labeled on your system, restarting, or disabling them. You can also share a printer with other computers on your network thereby making it a network printer. Depending upon the make and model of your printer, you can also check your printer’s consumables, such as toner or ink as well as paper, or send test print jobs.
Setting up a new local printer should be as easy as plugging it into your computer and powering it on. The printer should be automatically detected and configured. Once it is successfully detected, a printer icon will appear in the notification area of the panel and a notification popup will appear with the text Printer is ready for printing.
If your printer was not detected, you will need to follow these steps:
Open the Printers settings dialog.
Click the Add button in the toolbar or → → in the menu to open the dialog.
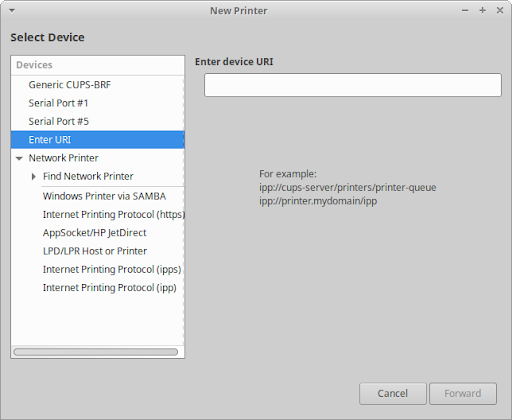
Select the appropriate Printer, Port, URI, Protocol or Network Printer entry in the Devices list on the left of the dialog. If your printer is not visible, you may need to click on the triangle next to « Find Network Printer » to expand the list of printers on your network.
Where applicable, fill in any relevant details into the text fields and/or dropdown lists on the right of the dialog and then click the button.
If you are adding a local printer, your computer will search for it and install its drivers. If you are installing a network printer, you will go through additional steps of selecting the printer manufacturer, printer model and driver.
You will then be prompted to enter a short name, description, and location of the printer.
Press the button to finalize the configuration of the printer.
You will be prompted with a dialog asking Would you like to print a test page?
If you press the button, a test page will print and you can verify if it printed correctly or you can press . Either way, your printer is ready to print.
If you are experiencing problems adding a printer with the steps above, you can try using the CUPS browser-based interface. It can be accessed at http://localhost:631/. Click the Administration menu item at the top of the page for options to add and find new printers. Do not make any changes in the Printers settings dialog or other system printer management utilities until you are finished using the CUPS browser-based interface. You may need to restart CUPS for it to reflect any changes that you make directly in the browser-based interface.
![[Note]](../../libs-common/images/note.png)
|
|
|
If the printer is directly connected to a Windows machine on your network, choose the Windows Printer via SAMBA entry from the Devices list. If you do not know the protocol or details of your network printer, you should consult the printer’s manual or ask your network administrator. Search the OpenPrinting database or check the Community Help Printer page for information on your printer. |
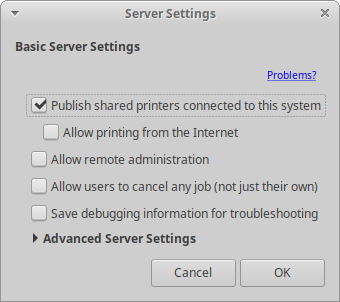
If you want to share your local printer with other computers on your network:
Open the Printers settings dialog.
Click → in the menu.
Enable the Publish shared printers connected to this system checkbox.
Click the button.
Then go to your secondary Xubuntu installation and open the Printers settings dialog. Click the Add button in the toolbar, then expand the Network Printer option. The shared printer should appear below as the sharing computer’s IP address. You may need to first search for the IP address using the Find Network Printer option.
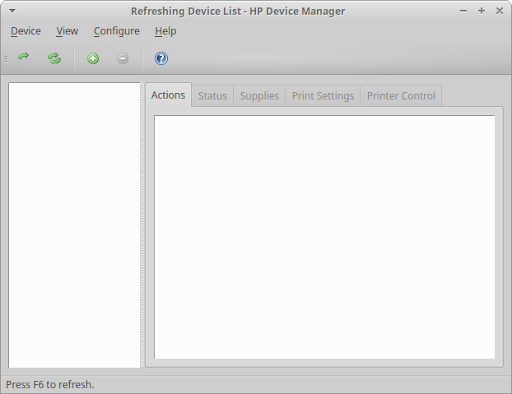
If you have an HP (Hewlett Packard) printer and would like additional software to manage it, you can install the HP Linux Imaging and Printing (HPLIP) GUI utilities (![]() hplib-gui
hplib-gui![]() and the Others category of the . On supported inkjet printers, you will be able to monitor ink levels, check printer status, change page size and print quality, as well as clean the printer heads. On supported laser printers you will be able to monitor toner level, check printer status, change page size, and manage print quality. For all-in-one (multi-function) devices, you will be able to change fax settings and functionality. For more information about HPLIP click here.
and the Others category of the . On supported inkjet printers, you will be able to monitor ink levels, check printer status, change page size and print quality, as well as clean the printer heads. On supported laser printers you will be able to monitor toner level, check printer status, change page size, and manage print quality. For all-in-one (multi-function) devices, you will be able to change fax settings and functionality. For more information about HPLIP click here.
The OpenPrinting database stores information about printers, their drivers, and how well they are supported under Linux. If you are not sure about how well a printer is supported in a Linux environment check that database. It is also a good database to check before buying a new printer.
Similar to Xubuntu’s support for printers, it also has plug and play support for many scanners, as many of them today come as part of multi-function devices. Scanner support on Linux is provided by the SANE project which maintains a list of supported scanners. Additional scanner support can be achieved with the installation of SANE-airscan (install), which allows driver-less network scanning with scanners that support Apple AirScan (eSCL) and Microsoft WSD.
To begin using your scanner, open the Document Scanner or Simple Scan app, which is accessible from the Graphics category of the ![]() (Ctrl + Escape) and in the Application Finder (Alt + F3). Follow the next steps to scan a document, picture/image, etc.:
(Ctrl + Escape) and in the Application Finder (Alt + F3). Follow the next steps to scan a document, picture/image, etc.:
Connect your scanner and power it on.
Place what you want to scan on the scanner flatbed or feeder.
Close the lid if you have a lid.
Click the arrow to the right of the button and choose the type of media you are scanning, Text or Photo.
Click the button to begin your scan.
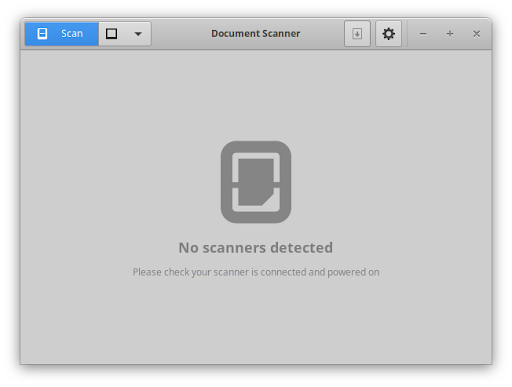
Il y a deux raisons pour lesquelles vous pourriez recevoir ce message :
Your scanner is not automatically supported, which includes most parallel port scanners and Lexmark All-in-One printer/scanner/faxes.
Le pilote pour votre scanner n'a pas été chargé automatiquement.
Vous pourrez peut-être faire fonctionner votre scanner en installant un pilote ou en modifiant certains fichiers de configuration. Merci de demander conseil sur les forums Ubuntu ou sur AskUbuntu.
|
|
|
|
To get some scanners working, you may need to plug the scanner in after the computer has booted. |
There are some scanners that have incomplete drivers from the SANE project. They can sometimes be used, but not all the features may work. For these scanners:
Install the ![]() libsane-extras
libsane-extras
Run pkexec mousepad /etc/sane.d/dll.conf at the command line to open the SANE driver file for editing.
Activez le bon pilote pour votre scanner en enlevant le # devant le nom du pilote. Vous pourriez avoir besoin de chercher sur le Web pour savoir quel est le bon pilote.
Enregistrez le fichier et ouvrez Simple Scan. Si tout c'est bien passé, votre scanner fonctionnera.
 |
 |
|
| Chapitre 8. Settings - Connectivity |

|
Chapitre 10. User Management |